The 12 Days of Christmas Baking
That's right, 12 days in a row, one recipe per day. We thought about this for a bit, since it would definitely be quite a bit of work to bake, photograph and blog all these recipes. We've been trying to think of ways to get many recipes posted within a short period of time, so we decided, since it's the holidays, to blog about our favorite old and new recipes! Welcome to our first post!
Let the Baking Begin!
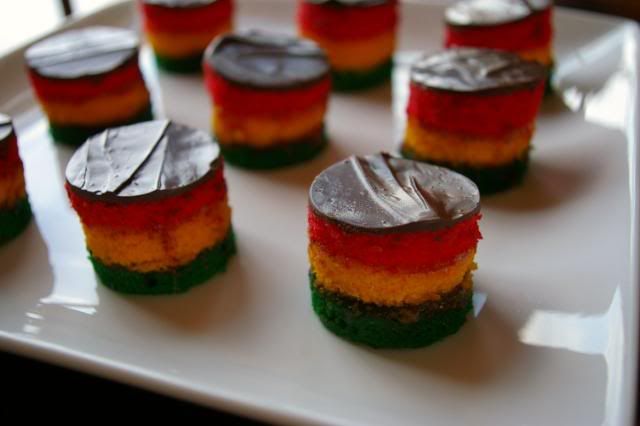
On the first day of Christmas, my true love gave to me Some tri-color Italian cookies.
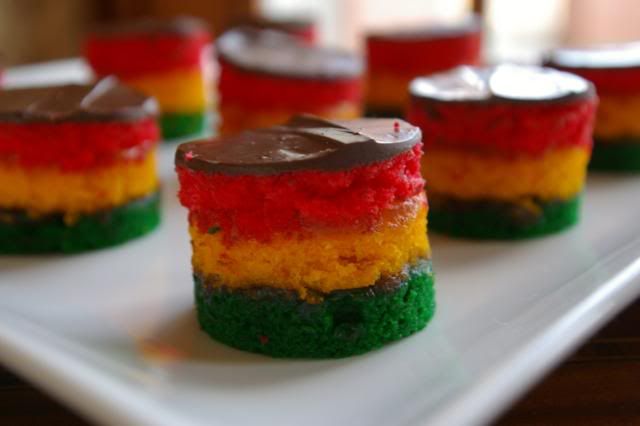
Intensely almondy, cake-like cookie layers with apricot preserves between them, encased in semi-sweet chocolate. These are Italian in origin, but mostly indigenous in New York.
In Italy, almond is a common flavor in baked goods. We love ANYTHING that has almond it. Almond cookies, almond cake, almond milk, almond granita, etc. The smell of almond takes us back to the summers in Italy where we would go to all the wonderful bakeries and pick out so many amazing pastries and cookies. One of our favorites have always been the soft and chewy amaretti cookies. There is just something about those cookies that are crisp and sugary on the ouside, chewy on the inside, and full of almondy flavor. While those are our old favorite almond cookies, these come pretty close! They are soo yummy and the colors are perfect for Christmas!
This recipe seems complicated but it's pretty simple and fast. What we like about these cookies is that the longer they sit, the more moist and flavorful they become!
Here is the recipe:
Ingredients
7 ounces almond paste
3/4 cup sugar
1/2 teaspoon almond extract
3/4 cup margarine or butter, room temp
3 eggs
1 cup all-purpose flour, Sifted
1/4 teaspoon salt
15 drops green food coloring
15 drops red food coloring
15 drops yellow food coloring
2/3 cup apricot preserves (pressed into a coarse sieve to remove any large pieces of fruit)
3 ounces semisweet chocolate
1 teaspoon vegetable shortening, butter flavored
Directions
Preheat Oven to 350 degrees.
Grease 3 8"x8" metal baking pans. After greasing, line the bottoms of the pans with wax paper, smoothing the paper down onto the pan. Grease the tops of the wax paper and then flour the pans. Put aside.
In a large mixing bowl, Beat together on medium-high speed the Almond Paste, Sugar, Almond Extract and butter until well blended. (there might be some small lumps of Almond Paste remaining and that's fine). Reduce speed to medium and beat in the eggs one at a time until blended. Reduce speed to low and then add the flour and salt slowly to the mixture until combined.
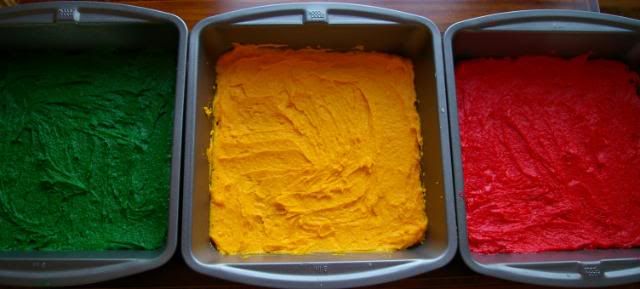
Take two small bowls and add 1 rounded cup of batter into each bowl. (there should be another rounded cup of batter still in the original mixing bowl.). Add 15 drops of red food color to one bowl,15 drops of green food color to another, and 15 drops of yellow food color to the last. Stir each bowl until evenly blended with color.
Spoon the Yellow batter into one pan. With metal spatula spread batter evenly (layer will be about 1/4 inch thick). Repeat with red batter in second pan and green batter in remaining pan.
Bake until set and toothpick inserted in center of layers comes out clean. 10-12 minutes. Cool in pans on wire rack about 1/2 hour. Cake should be cool to the touch. Run tip of knife around side of pans to loosen layers.
Lay a piece of wax paper on a flat surface that will be able to fit in refrigerator. Take the green layer and flip over pan onto wax paper. Gently pull off the wax paper. Spread 1/3 cup of apricot preserves onto the green layer. Take the yellow layer and remove from pan. Place it onto the green layer with the wax paper side up. Press down gently and then remove the wax paper.
Spread remaining 1/3 cup of Apricot preserves onto the yellow layer. Take the remaining red layer and remove from pan and place upon the yellow layer again with the wax paper side up. Press down gently and remove the wax paper.
In a 1 quart saucepan, heat chocolate and butter flavored crisco over low heat, stirring frequently, until melted. Spread melted chocolate mixture on top of the red layer evenly.
Refrigerate until chocolate is firm, at least 1 hour. (at this point, if you want, you can cover and refrigerate for up to 3 days before serving).
To serve, with a large sharp knife, trim about 1/4 inch from the edges. Cut the stacked layers into 6 strips. Cut each strip crosswise into 6 pieces. You will get 36 square cookies from this. (I used a circle biscuit cutter).
Place the cookies in a single layer in a waxed paper lined container. They can be refrigerated for up to one week or freeze up to 3 months. These cookies must be kept in the fridge.


4 comments:
These are the most colorful cookies I have ever seen! They sound yummy too:P
Thanks Lisa!
They are pretty colorful! Thanks for stopping by!
I just made these and it reminds me of growing up in my Dad's Italian Bakery because he had this on his menu. They always made the Italian cookie trays look pretty when these are added. :) I made them once before and lost the recipe and so I googled and found yours. My parents are both from Italy as well. :) Thanks for the recipe and beautiful photos. Mine are gonna be cut in the traditional square but I love how you cut them round too.
tri-color,yes...but the colors in this sweet are representative of the colors in the Italian flag.When I was a child we called these Italian sweets "bandierina",as they simulate little Italian flags...
Post a Comment